This season I decided to take a break from making Davidson’s Plum jam. Unfortunately though, my tree didn’t receive the notification and consequently ripe plums have been raining down for several weeks. I’ve offered them… More

life in paradise and other unrelated things …
This season I decided to take a break from making Davidson’s Plum jam. Unfortunately though, my tree didn’t receive the notification and consequently ripe plums have been raining down for several weeks. I’ve offered them… More

Whilst not technically birding from my armchair, I usually notice birds in the nearby trees in late in the afternoon just after I sit down for a glass of wine. So, I’ve developed a stalking… More
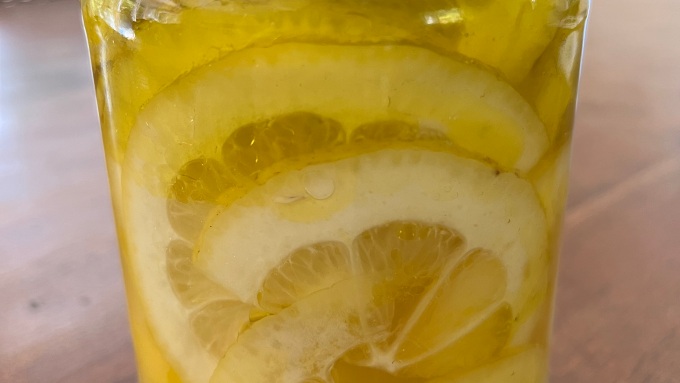
This is a delicious, quick and simple recipe for when you have a glut of lemons … You will need: 3 medium lemons – preferably home grown, organic or chemical free3 tablespoons of salt3 tablespoons… More

Here’s what you do when your town goes into a soft-lockdown and you have a list of home maintenance jobs that you really don’t want to do. Find an excuse to do something else …
I challenged myself to make a Bower Box using only treasures found in my garden, and not to buy anything specifically for the project, although I admit to one cheat, the wooden jewellery box which I had already purchased for another project. The idea came from a wooden gift box of gourmet goodies sent to me by my neighbours as a thank-you. I just couldn’t bear to throw it away. The blue paint came from a left over can in the garage and the lichen came from trees in the garden.
Inspiration came from one of my favourite books, Sibella Court’s “Bowerbird”.
(bowerbird –noun informal, mainly Australian a person who collects miscellaneous objects – that’s me!)


I’ve never understood why it’s so hard to find a dead cicada on the ground when thousands of them hatch each year. Surely they can’t all be eaten by birds? Anyway, after much scratching around over several cicada seasons, I’ve managed to find and identify five species. Maybe this year will bring me a Greengrocer to complete the collection. I’m almost looking forward to Cicada Season. Maybe not?


The pigeon skull came from a brown cuckoo-dove which flew into a window and was thankfully killed instantly. The rat perished after becoming stuck in a wall cavity. Both were buried in my compost bin, where the worms and bugs went to work. They didn’t quite finish the job, so I had to complete the gruesome task.


I wanted to include two nests in my display. One of the nests fell out of a tree on a windy day, the other is a fake. Can you tell which one?


We will be under lockdown for another week, so I’m looking for another excuse NOT to clean my windows.


Burnt Citrus Syrup Recipe
(this is a delayed gratification recipe!)
It’s citrus time again. When friends and neighbours chase you down the street almost begging you to take their home grown lemons, limes, oranges, or kumquats. The trouble is of course, that EVERYBODY has citrus at the same time!
So here’s something you can do with all that citrus …
You will need
Step 1 -Burn your Citrus
Step 2 – Preserve your citrus
While the citrus is in the oven get your sugar syrup ready and sterilise your jars – this can be left until the last 30 minutes of cooking time.
Step 3 – Bottle and wait …
Note: this makes a very sweet, unctuous syrup which can be diluted. Prolong the life of the syrup by storing it in the fridge. If you are scrupulous with sterilising, the syrup will last for several years – I am still using my 2018 vintage!
Uses: pour on ice-cream, make mocktails, or dilute with soda or tonic water.

COVID-19 Update: For the past couple of months, we have all been busy Isolation Baking, trying out new recipes or re-visiting old ones. As I was lucky enough to be offered several kilograms of Davidson’s Plums, I decided to revisit the recipe I posted in 2012, update it a bit and repost. So here it is …
The summer after I moved to my new house I was excited to discover a mature Davidson’s Plum tree at the back of the property. I was excited for two reasons. Firstly it seems that neither bats nor birds are attracted to the fruit, and secondly and very conveniently the fruit drops when ripe and all you have to do is pick it up. I placed some weed mat under the tree to stop the fallen fruit rolling away into the undergrowth, but I missed some and now have several small trees growing around the base.


Davidson’s Plum fruit and jam are becoming more readily available, and can be found in some gourmet and “bush tucker”stores if you don’t want to wait the 4-5 years for your tree to fruit. I have a Davidsonia jerseyana – which is native to the sub-tropical rain forests of Northern New South Wales. The fruit of this tree is extremely tart and only the very brave would attempt to eat it raw. If you can eat a lemon, you could probably cope with a Davidson’s Plum! It also has 100 times the Vitamin C found in oranges.
It’s very low in pectin so if you want to make a nice thick jam you’ll need to add some. Rather than add the commercial stuff, I experimented with green apples. My recipe Davidson’s Plum Jam works quite well and the resulting jam has a tangy/sweet taste which goes particularly well with toasted macadamia and fruit bread from Bellingen’s Hearthfire Bakery

Davidson’s Plum Jam Recipe
See my post on Davidson’s Plums
500 gm fresh Davidson’s Plums (**see below for frozen)
500 gm sugar
juice of half a lemon
½ a vanilla pod – split open
Packet of pectin (eg: Jamsetta) just in case
(Makes 2 x 250gm pots – I usually double this recipe)
Occasionally my jam just refuses to set, or I run out of pectin.
Don’t worry, it makes a great sauce on chocolate ice-cream!
