Davidson’s Plum Jam Recipe …

Davidson’s Plum Jam Recipe

See my post on Davidson’s Plums

500 gm fresh Davidson’s Plums (**see below for frozen)
500 gm sugar
juice of half a lemon
½ a vanilla pod – split open
Packet of pectin (eg: Jamsetta) just in case
(Makes 2 x 250gm pots – I usually double this recipe)

  • Wash the plums to remove any dust or dirt.  Cut the plums in half and make sure that you remove the two small seeds. Wear gloves if you don’t want to end up with nasty purple fingernails.
  • Put the plums, lemon juice and sugar into a saucepan and add just enough water to stop the bottom layer from burning (approximately 20mls) – no more or it will take too long to reduce.
  • Bring the fruit to a simmer very slowly, stirring all the time to ensure that the sugar is dissolved before the liquid starts boiling.
  • Add the vanilla pod.
  • Put a small saucer in the freezer to chill
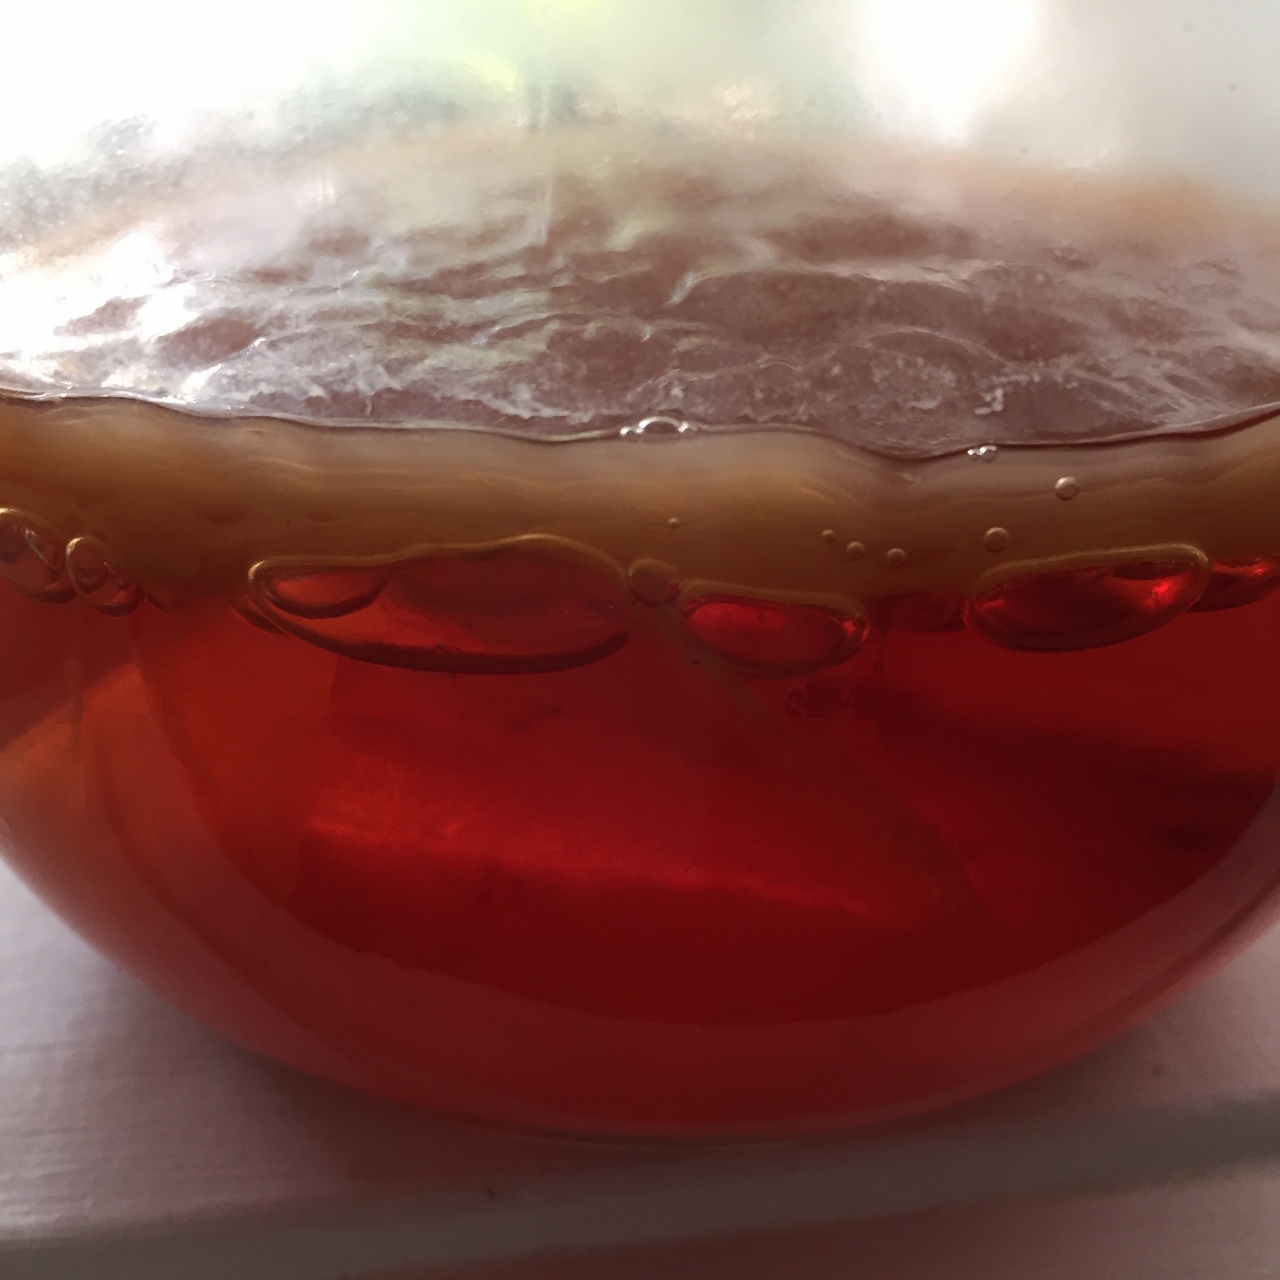
  • Leave on a gentle simmer for 1-2 hours until the mixture has thickened and reduced.  Test the jam by dropping a teaspoonful on the frozen saucer – it should almost immediately thicken.
  • Sometimes (often), if the plums are not very ripe or particularly watery, the jam will not set, and rather than use more sugar I will add the pectin.  Follow the instructions on the packet, and don’t add too much until you have tested again on a saucer.
  • When you are happy with the set, remove the vanilla pods.
  • Allow to cool slightly.  If you want a smooth jam, you can blitz with a stick blender.  Then spoon into sterilized jars.

    ** Frozen plums – I often freeze my plums in 1Kg containers.  If you do this, the seeds can easily be squeezed out of the half defrosted plums. Also, I only recently learnt that if you freeze fruit, it reduces the gelling effect of the natural pectin.  So you will definitely need Jamsetta or similar.

Occasionally my jam just refuses to set, or I run out of pectin.
Don’t worry, it makes a great sauce on chocolate ice-cream!

Purple Cabbage, an eco-print recipe


I am in no way an expert on the eco-print process, but over the last few weeks I have worked out a relatively fail-safe method of printing plant images on to paper using purple (red) cabbage. Keep in mind that you will never get the same result twice – it’s just the way with nature – so expect the unexpected …

If you’d like to see some of the results I’ve achieved using this method, Hopelessly addicted to cabbage.

Preparation …

Gather up a bucket of foliage, leaves and flowers of different textures, shapes and colours.  Avoid large soft leaves as they can turn to mush when they are simmered – geranium leaves are an exception.  Gather more than you think you need.

Some of the leaves and flowers that I used were – lilly pilly, geranium, tree fern fronds, red camellia, tulipwood, lemon myrtle, salvia, grevillea, bamboo and eucalyptus.

Make up a spray bottle of vinegar spritz – I used approximately 70% water/30% cheap white vinegar.

Gather up your paper – try 80/110/180 gsm paper or swing tags or whatever.

The Process …

Start layering your paper and plant matter.  Spritz the paper, then lay down the plant matter and spritz again.  Use plenty of plant matter because some will leave colour, some will interact with each other, some will just leave an outline and others will do absolutely nothing.  Keep layering until you have a thick but manageable bundle.

I use a piece of ordinary 80gsm computer paper for the first and last layers of the bundle – this protects the paper from excess colour.

Use bulldog clips or string to secure your bundle so that the paper and plant layers are pressed firmly together.

Put the bundle in your container of water and bring slowly to a simmer – NOT a boil.  Then simmer for 20 minutes.

Then for a small container, add approximately half a small purple cabbage, chopped into smallish chunks, and ½ a tsp of either alum or copper.

Simmer DO NOT BOIL for 20 minutes and then TURN OFF THE HEAT.  This is really important because if you continue to simmer the cabbage it can “de-nature” which will turn the dye brown and give your paper a muddy look.

Now the Hard Bit …

Step away from the pot and don’t open the bundles until the following day.

The Next Day … (or longer)

Remove your bundles from the pot and stand them in the sink for about half an hour to drain.  Then untie your bundle and carefully peel away the layers, watching out for plants that give a particularly nice outline or colour.  Then leave them to dry on a towel – I don’t wash my papers.

The Day After that …

Do it all again😊

Ugly Apple Cake …

OK so that’s obviously not the real name of this cake, but a post by David Lebovitz happened to arrive in my Inbox the same week as the first June Bellingen Growers Market, and seeing as it’s apple season, it all seemed a bit serendipitous.

The Bellingen Growers Market is held at the showgrounds on the second and fourth Saturday of each month, and it’s a small, eclectic mix of bric-a-brac, plants, books, second-hand clothes and of course most importantly home-made, home-grown and mostly organic  or spray-free seasonal food.  The fruit and veggies are not the perfect, polished specimens you find at the big supermarkets (you know, the kind that have been in storage for months – maybe even since last season!)  They are more often than not, distinctly ugly …


Of course, it’s what’s on the inside that counts, so I picked four knobbly, pock-marked red varieties, one of which was so crisp and tasty that didn’t even make it into the cake. Luckily I bought extra, but I need to go back to the next market as I don’t remember which variety it was.  Anyway the recipe is straightforward so just follow the link

The only change I made to the recipe was to substitute Frangelico for the dark rum (to save buying yet another bottle of alcohol) and to drizzle some lemon icing over the top (because I just happened to have half a lemon to use up).

The result was unanimously declared to be delicious… eat fresh, eat local and eat ugly fruit!

My pet scoby …

I am a complete novice when it comes to fermenting Kombucha.  But I decided to try making it myself after sampling several bottles of commercially produced and boutique organic Kombucha. I found them to be either overly effervescent, or the flavours not to my liking.  So after consulting the internet, I decided to “give it a go”.  And it’s fascinating – like having a small, well-behaved but slightly repulsive pet.

I managed to grow my own scoby, the hard way, from the dregs of a bottle of local organic Kombucha. It took six weeks, but it may well have taken less time if I hadn’t sniffed, prodded, poked and held it up to the light every day.  I probably didn’t give it enough sugar either, because once I added a little sugar syrup, the sad looking scoby perked right up, and within a few days “she” was blowing bubbles.

Happily blowing bubbles

So throwing caution to the wind, I made up my first big batch of sweet tea, let it cool and then slid the scoby into the jar. She promptly flipped on her back and sank like a stone.  OMG – I’ve killed her!  Consult the internet – apparently not a disaster, it happens quite often.  After a couple of days she rose to the top of the jar and I was able to flip her back.

OMG I’ve killed her!

Then she started growing all sorts of trailing appendages and dropping bits of sediment.
Consult the internet again – apparently normal.  I’m a bit dubious because “normally” something that looks like this would go in the compost.

What’s going on here?

And then yesterday, on the seventh day of fermentation, I drank my very first glass of home-made Kombucha and it was delicious. Just a touch of sugar, a little effervescence, and a hint of black tea.  Poured over ice cubes on a horrible, hot and windy 36 degree day, it really hit the spot.

I’m not a tea drinker, and I’ve always found black tea to be somewhat bitter, but I really felt like it didn’t need any other flavouring.  Well, perhaps just a bit of ginger or a little Turmerix powder for extra health benefits.  The next batch is already fermenting …

Some hints:

  • Here is a link to the website I used to get me started – she is very informative.
  • I used the proportions: 1 litre filtered water, 2 organic black tea bags, 55g sugar, 100 ml of store bought organic Kombucha. I used the dregs from the bottom of the bottle.  Once you have fermented your first batch, you can use 100 ml of that to start your next batch.
  • Make sure you keep the scoby covered with cloth, and sterilise your jars and bottles by filling them with boiling water.
  • Start tasting from the seventh day, when it should be slightly sour and fizzy. The longer you leave the scoby in, the more vinegary it gets.
  • I filtered the Kombucha through cheesecloth to remove most of the sediment
  • Finally, here is a link to a website which shows what your scoby should and should NOT look like.